기본동작 따라하기
가로 480px, 세로 280px 배너를 실시간으로 생성하는 간단한 예제를 통해 기본동작을 익혀본다. 클라이언트 입력에 의해 이미지, 텍스트, 배경을 변경할 수 있다.
1. 원본서버 준비
1.1. banner.html 생성
banner.html 파일을 로컬에 생성한다.
<html>
   <body style="background-color:orange;">
      <div style="width: 480px; height: 240px; text-align: center; vertical-align: middle;">
         <br>
         <img src="https://demox.winesoft.co.kr/demo/assets/image/google_logo.png" height="100">
         <br>
         <h1>hello m2</h1>
      </div>
   </body>
</html>
위 페이지를 브라우저로 로딩하면 아래와 같이 표현된다.

1.2. banner.html 업로드
웹서버 또는 HTTP 서비스가 가능한 오브젝트 스토리이지에 banner.html 를 업로드한다.
http://{server-ip}/banner.html
Note
여기서는 127.0.0.1:8080 을 원본서버 주소로 설명한다.
2. 가상호스트 구성
2.2. 연동 테스트
다음 주소 중 하나를 호출하여 banner.html 이 정상 표현되는지 점검한다.
http://mybanner.com/banner.html
http://{server-ip}/banner.html
3. 로고, 배경, 텍스트 변경하기
다음 URL 호출을 통해 로고, 배경, 텍스트를 임의대로 조합한 배너를 만들어 본다.
http://{server-ip}/banner.html/render/args/logo=amazon;bgcolor=darkseagreen;text=Spend%20less.%20Smile%20more.

3.1. 로고 변경하기
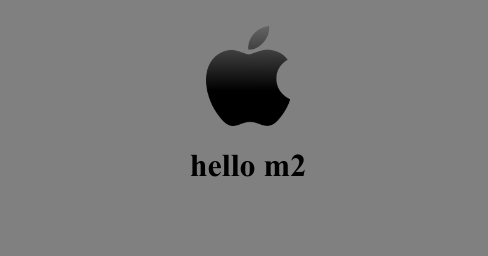
google, apple, amazon 3개의 로고를 실시간으로 변경하고자 한다. 예상되는 URL은 다음과 같다.
http://{server-ip}/banner.html/render/args/logo=google
http://{server-ip}/banner.html/render/args/logo=apple
http://{server-ip}/banner.html/render/args/logo=amazon
banner.html 이 입력조건에 따라 다른 이미지를 로딩하도록 <img> 태그를 nunjucsks - If Expression 을 이용해 수정한다.
{% if args.logo == 'google' %}
   <img src="https://demox.winesoft.co.kr/demo/assets/image/google_logo.png" height="100">
{% elif args.logo == 'apple' %}
   <img src="https://demox.winesoft.co.kr/demo/assets/image/apple_logo.png" height="100">
{% elif args.logo == 'amazon' %}
   <img src="https://demox.winesoft.co.kr/demo/assets/image/amazone_logo.png" height="100">
{% else %}
   <img src="https://doc.m2live.co.kr/_static/img/logos/winesoft_logo.png" height="100">
{% endif %}
Tip
이미지 스토리지가 있다면 더욱 간결하게 표현이 가능할 것이다.
<img src="https://storage.myservice.com/images/{{args.logo}}.png" height="100">
압축파일 안에 있는 이미지라도 unzip 함수를 이용하면 손쉽게 추출이 가능하다.
<img src="https://example.com/src.zip/unzip/files/{{args.page}}" height="100">
이제 logo 변수를 호출하여 아래와 같이 로고가 변경된 이미지가 응답되면 성공이다.
http://{server-ip}/banner.html/render/args/logo=apple

3.2. 배경 변경하기
배경색을 나타내는 bgcolor 변수를 추가한다.
http://{server-ip}/banner.html/render/args/logo=apple;bgcolor=gray
배경색이 이미지에 반영되기 위해서는 <body> 의 속성에 입력값을 매핑한다.
<body style="background-color:{{args.bgcolor}};">
이제 호출 결과는 다음과 같다.
3.3. 텍스트 변경하기
텍스트도 같은 방식으로 변경이 가능하다.
http://{server-ip}/banner.html/render/args/logo=apple;bgcolor=gray;text=new%20world
Warning
텍스트는 반드시 URL 인코딩이 필요하다.
텍스트를 반영하기 위해 <h1> 의 값을 맵핑한다.
<h1>{{args.text}}</h1>
이제 호출 결과는 다음과 같다.

멀티라인을 입력하고 싶다면 태그로 다음과 같이 표현되어야 한다.
<h1>welcome to the<br>new world</h1>
여기서 본문에 해당하는 welcome to the<br>new world 를 URL 인코딩하여 호출한다.
http://{server-ip}/banner.html/render/args/logo=apple;bgcolor=gray;text=welcome%20to%20the%3Cbr%3Enew%20world

3.4. banner.html
최종 banner.html 은 아래와 같다.
<html>
   <body style="background-color:{{args.bgcolor}};">
      <div style="width: 480px; height: 240px; text-align: center; vertical-align: middle;">
         <br>
         {% if args.logo == 'google' %}
            <img src="https://demox.winesoft.co.kr/demo/assets/image/google_logo.png" height="100">
         {% elif args.logo == 'apple' %}
            <img src="https://demox.winesoft.co.kr/demo/assets/image/apple_logo.png" height="100">
         {% elif args.logo == 'amazon' %}
            <img src="https://demox.winesoft.co.kr/demo/assets/image/amazone_logo.png" height="100">
         {% else %}
            <img src="https://doc.m2live.co.kr/_static/img/logos/winesoft_logo.png" height="100">
         {% endif %}
         <br>
         <h1>{{args.text}}</h1>
      </div>
   </body>
</html>
4. 함수 연결하기
대표적으로 dims (명령어 리스트)와 결합되면 가공된 이미지를 즉시 원하는 크기로 가공할 수 있다.
{
   "hosting": [
      {
         "name": "mybanner.com",

         ... (생략) ...

         "functions": {
            "contents": {
               "dims": {
                  "meta" : {
                     "enable" : true

   ... (생략) ...
}
dims 함수를 활성화한 뒤 다음과 같이 호출한다.
http://{server-ip}/banner.html/render/...(생략).../dims/resize/100/rotate/90
단일 URL 호출(=http single transaction)로 이미지 생성과 2차 가공을 한번에 수행이 가능하다.

조금 더 발전시키보자. 생성된 이미지를 S3에 실시간으로 업로드하려면 aws_s3 함수를 활성화한다.
{
   "hosting": [
      {
         "name": "mybanner.com",
         ... (생략) ...
         "functions": {
            "backend": {
               "aws_s3": {
                  "meta" : {
                     "enable" : true
                  },
                  "endpoints": [
                     {
                        "name": "mybucket",
                        ... (생략) ...
}
render 와 dims 명령 사이에 aws_s3 를 배치하여 호출한다.
http://{server-ip}/banner.html/render/...(생략).../aws_s3/pub/mybucket/dims/...(생략)...
위 URL 호출은 다음과 같은 순서로 동작한다.